Updated Van Tilt Sensor
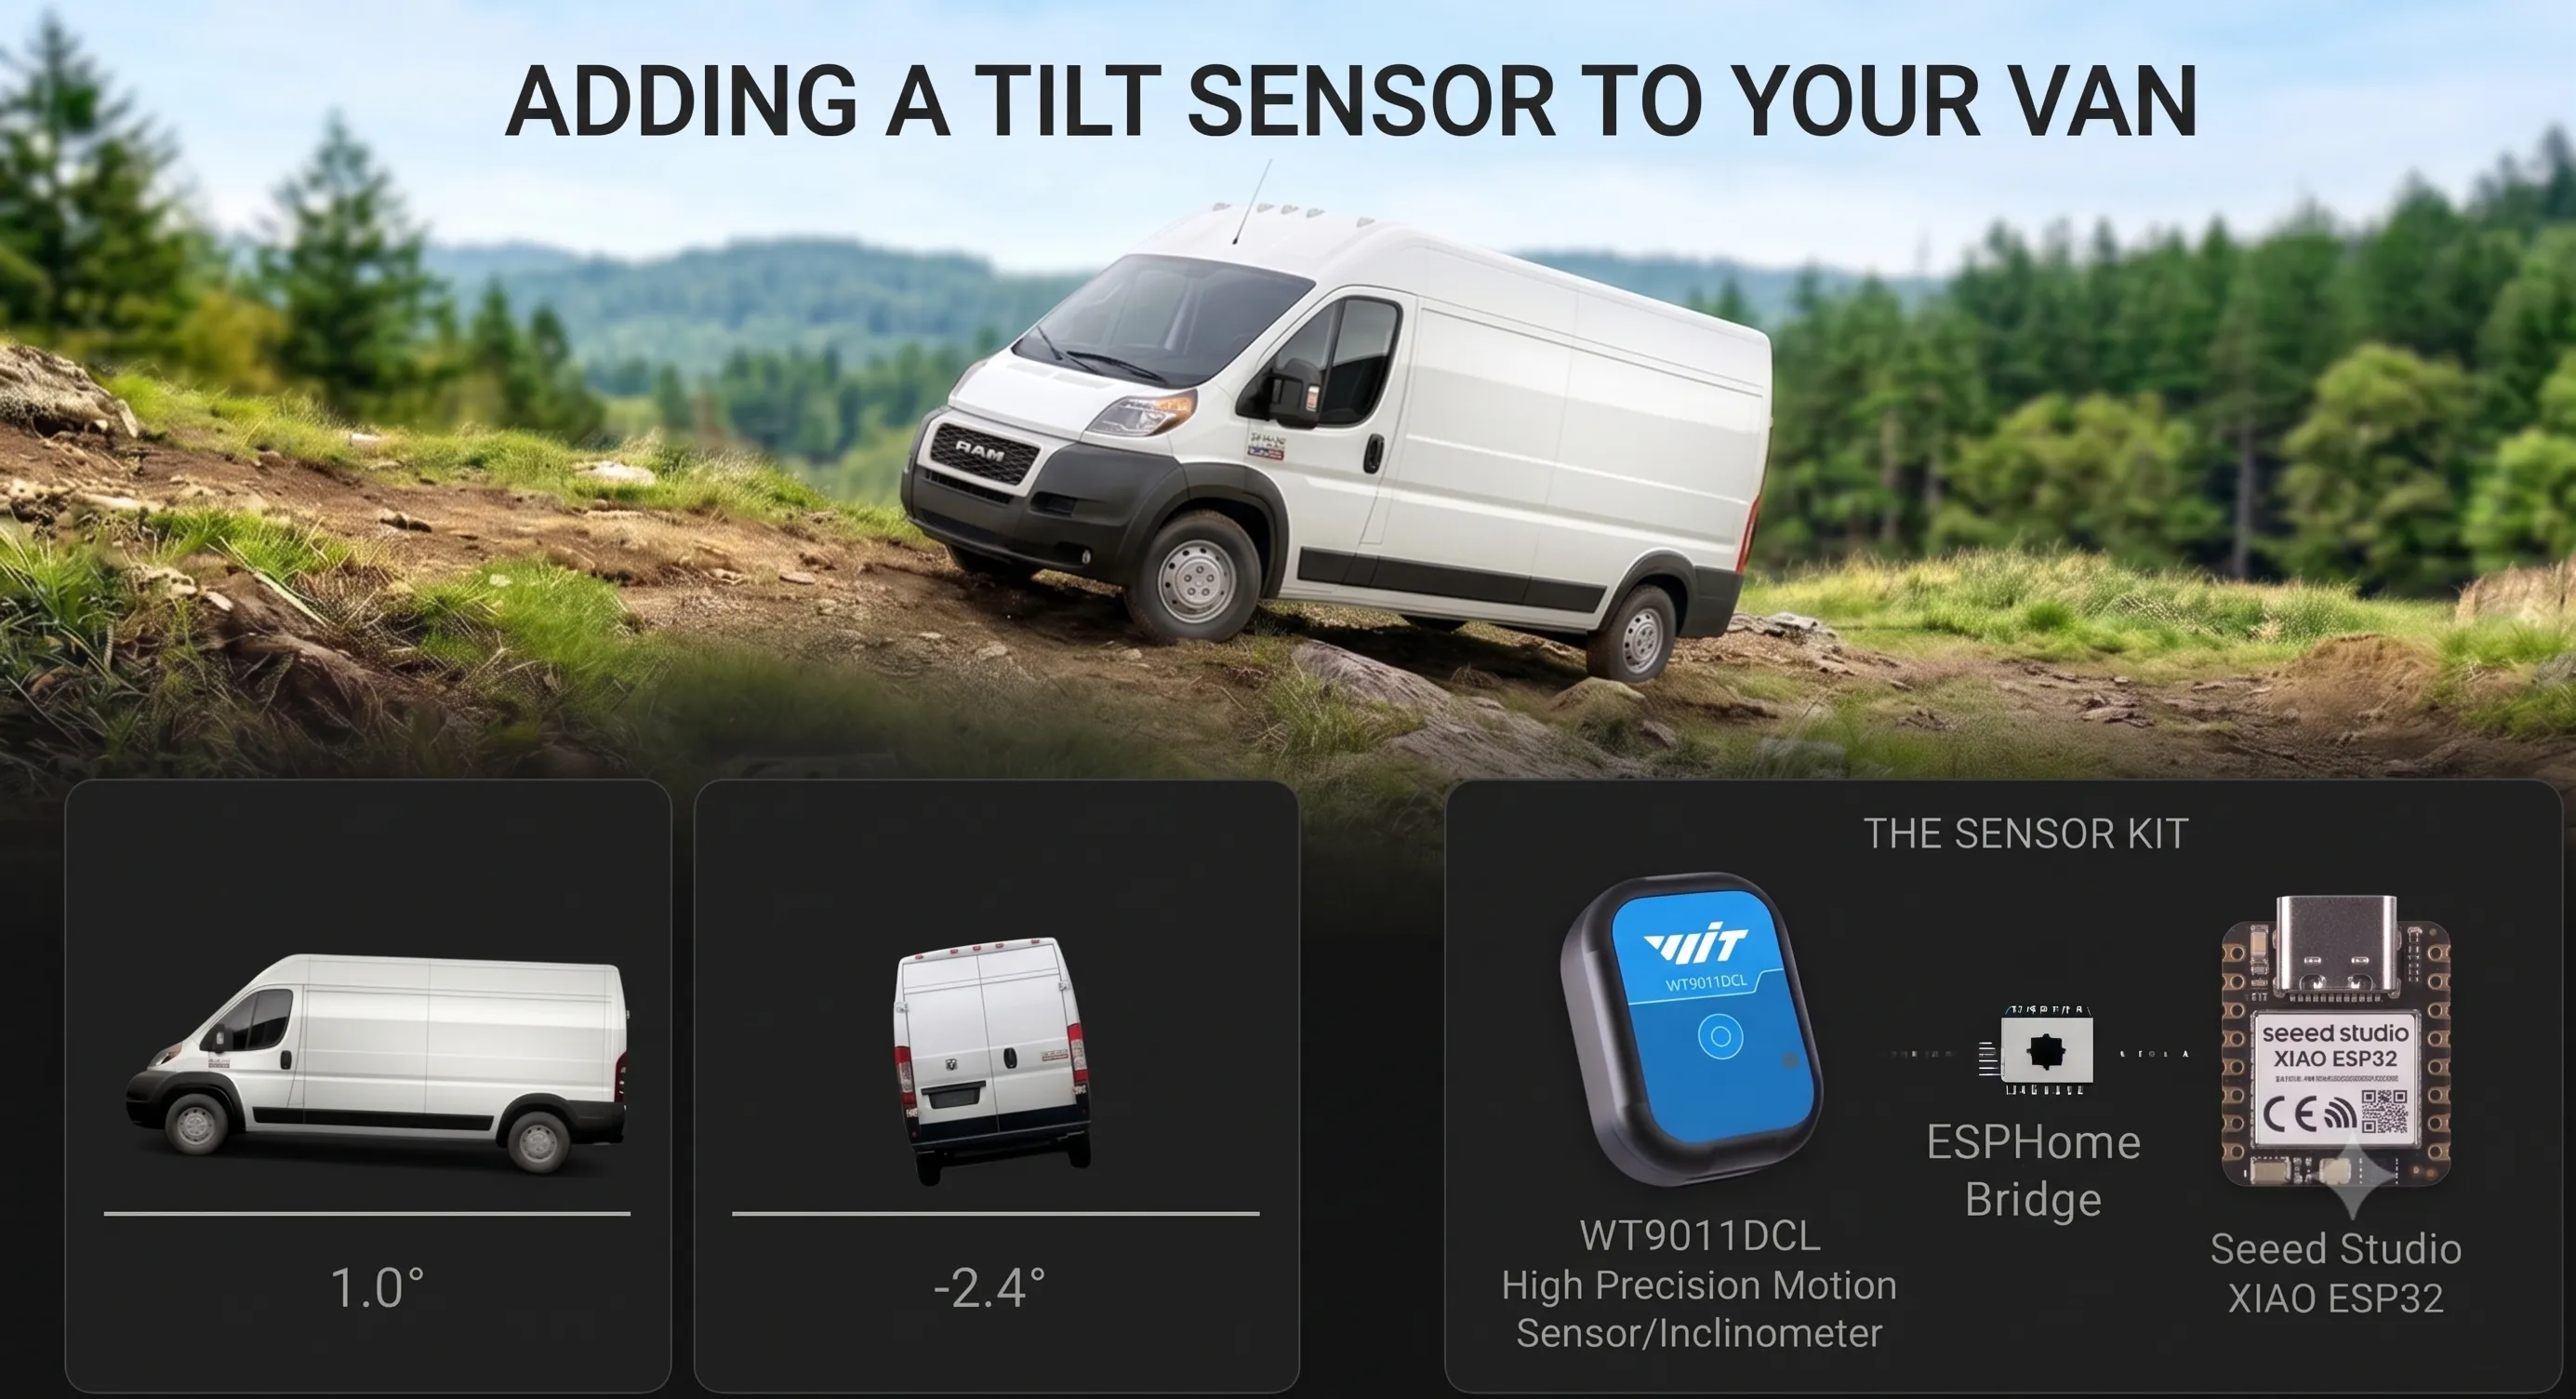
A while back I built a van tilt sensor using an MPU6050 accelerometer. It worked great, but it relied on a custom PCB that I had designed. It could be done without the custom PCB, but you’d still need to wire the MPU6050 to an ESP32 devkit, and the sensor would still need calibration. For a second pass at this project, I wanted to make this more accessible by only using off the shelf parts and not requiring any calibration or wiring. I also updated the custom Lovelace card to be easily installable in Home Assistant through HACS.
What you’ll need
Section titled “What you’ll need”- WitMotion WT9011DCL BLE IMU — A small 9-axis IMU that streams acceleration, gyroscope, and tilt angles over Bluetooth Low Energy
- ESP32 Dev Board — Any ESP32 variant with BLE works. Acts as a bridge between the WitMotion sensor and Home Assistant.
- USB-C Cables — Both the ESP32 and the WitMotion sensor use USB-C cables for power. They both have very low power draw, so any USB port in your van should work for them.
- Double-sided mounting tape or velcro — For mounting the sensor flat somewhere in the van.
The WT9011DCL Sensor
Section titled “The WT9011DCL Sensor”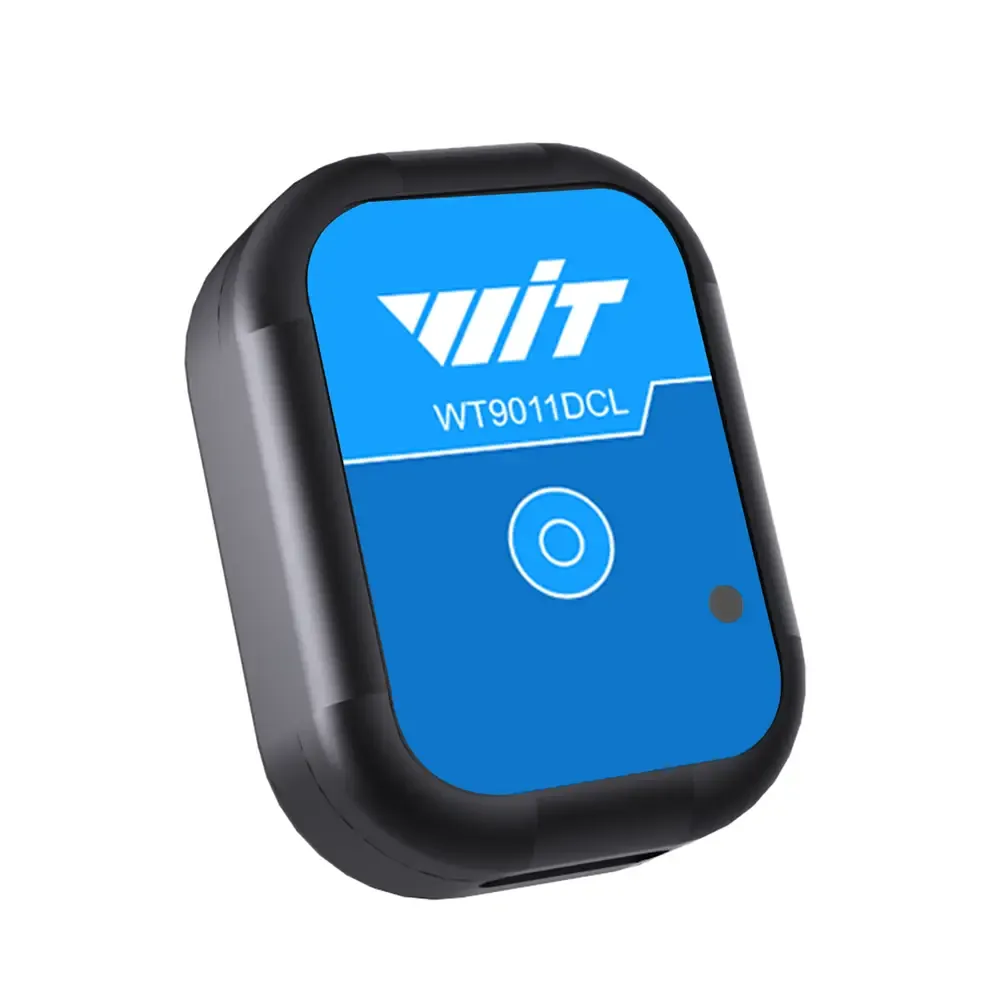
While searching online for an alternative to the custom hardware I had previously built, I came across the WitMotion WT9011DCL sensor. It seemed like a perfect candidate for my tilt sensor, so I immediately ordered one. I knew WitMotion had their own software that works with the device, but also found this open source python project, so I was pretty confident I’d be able to adapt this to work with Home Assistant.
Connecting to Home Assistant
Section titled “Connecting to Home Assistant”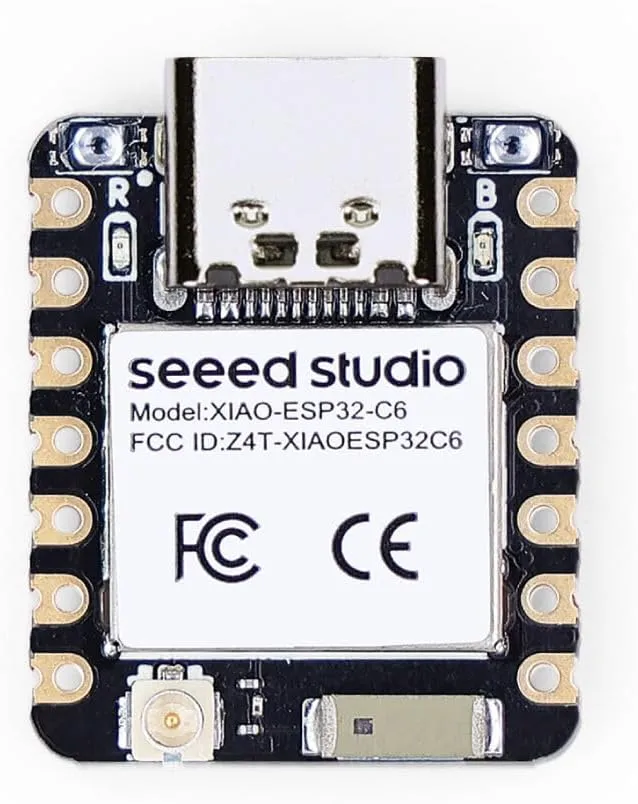
Since I’m running Home Assistant on a Home Assistant Green which doesn’t have Bluetooth, I needed a bridge between the WT9011DCL and Home Assistant. ESPHome was the perfect candidate since it so easily integrates into Home Assistant and runs on an ESP32 devkit which I had plenty lying around. There are also many existing examples of using ESPHome as a Bluetooth proxy for Home Assistant. With ESPHome I could have the ESP32 handle the connection to the WT9011DCL, decode the data, and only expose the sensors that I need to Home Assistant.
Decoding the data
Section titled “Decoding the data”With the BLE side handled by ESPHome’s existing ble_client component, the work left was figuring out what the WT9011DCL actually streams once it’s connected — which BLE characteristic to subscribe to, and how to turn the raw bytes into roll, pitch, and yaw. The pywitmotion project provided a good starting point, as well as the WT9011DCL documentation.
Finding the service and characteristic
Section titled “Finding the service and characteristic”Every BLE device advertises a list of services, and inside each service a list of characteristics — those are the actual endpoints you read from, write to, or subscribe to for notifications. I needed to find the one that the WT9011DCL pushes its IMU data on.
The fastest way to look at this on any BLE device is the nRF Connect App (also available on iOS). Once you connect to the sensor, you can view every service and characteristic with their UUIDs, properties, and values:
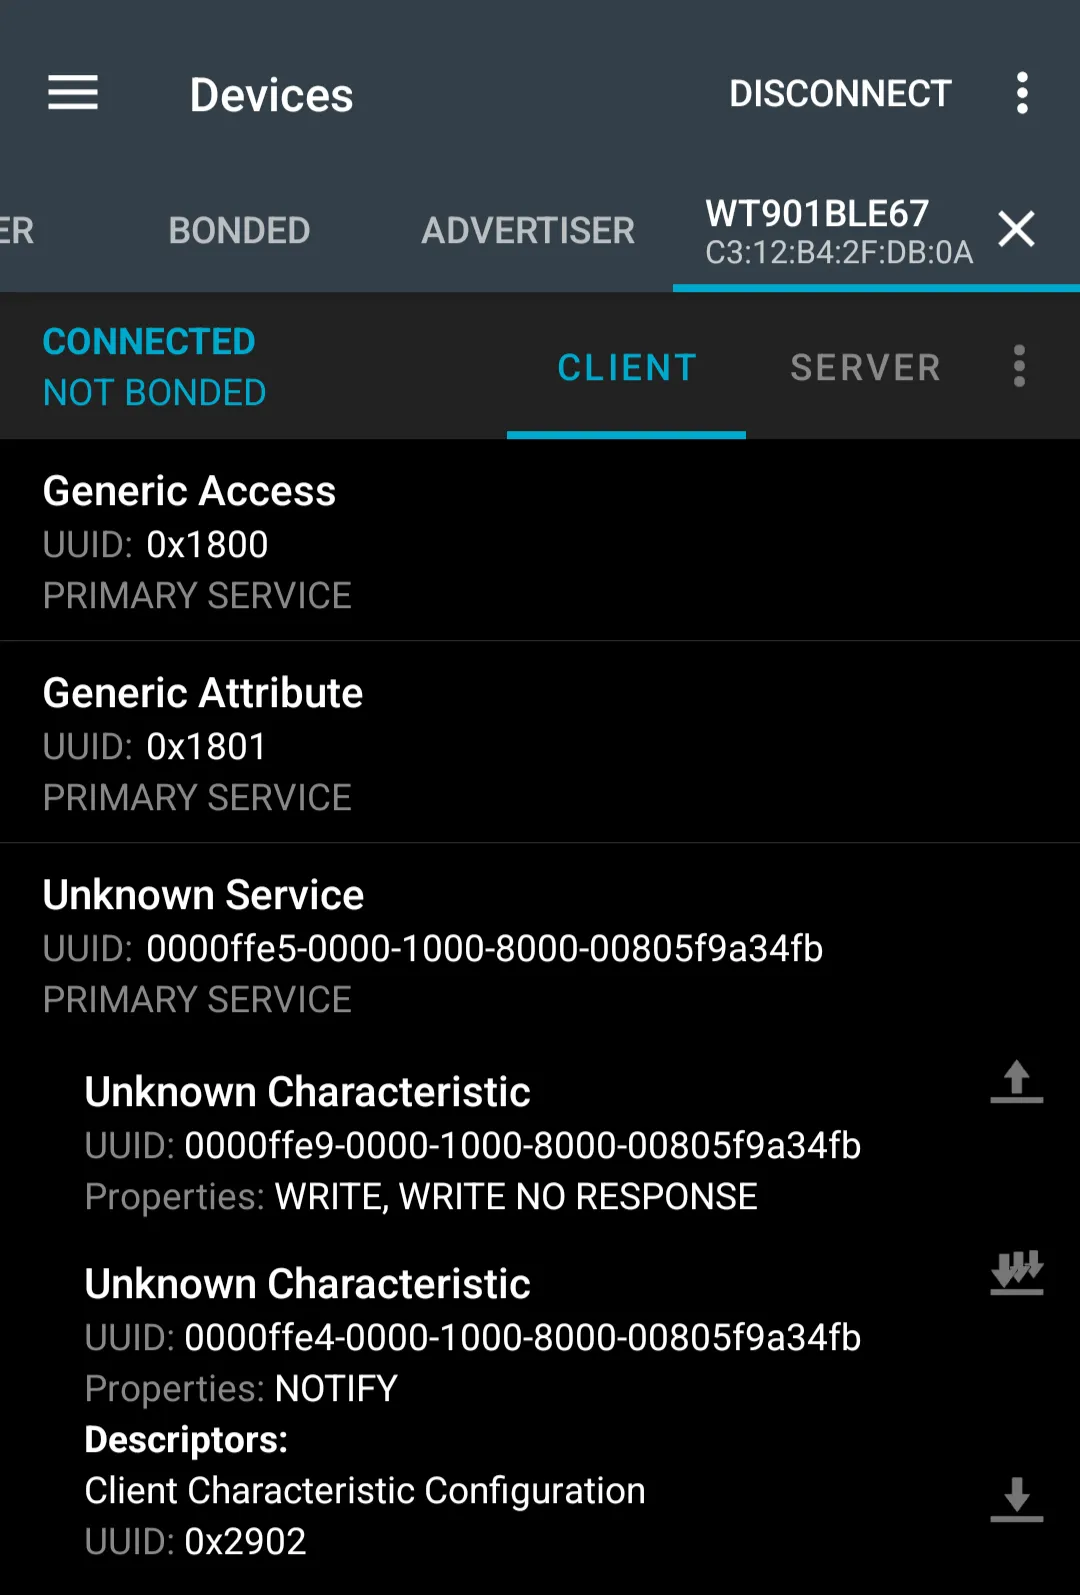
On the WT9011DCL, one service stood out:
- Service UUID:
0000ffe5-0000-1000-8000-00805f9a34fb - Characteristic UUID:
0000ffe4-0000-1000-8000-00805f9a34fb
The characteristic at 0xffe4 had the NOTIFY property set, which means the device pushes data to you on its own schedule instead of waiting to be polled. Hitting “subscribe” in nRF Connect immediately started filling the screen with 20-byte hex strings, several per second — clearly the IMU stream. The pywitmotion project used the same UUIDs in its source, which was a nice sanity check that I had the right characteristic.
Figuring out the packet format
Section titled “Figuring out the packet format”With raw packets coming in, the next step was decoding them. The pywitmotion source had the format roughly worked out, and WitMotion publishes a Bluetooth communication protocol PDF that confirmed the details. A few things were clear from the byte stream itself:
- Every packet starts with
0x55 0x61. Watching the hex stream, those two bytes are at the front of every notification — a fixed header that lets a parser sync up and reject anything malformed. - The remaining 18 bytes are nine 16-bit values. Three for the accelerometer, three for the gyroscope, three for the Euler angles. Each one is a signed 16-bit little-endian integer (low byte first).
- Each value is a fraction of full scale. Raw
0x7FFF(32767) is “max positive,” raw0x8000is “max negative.” You divide by 32768 and multiply by the sensor’s configured range — ±16 g for the accelerometer, ±2000 °/s for the gyroscope, ±180° for the Euler angles. A roll reading of0x4000(half of full scale), for example, decodes to 90°.
| Bytes | Field | Scale |
|---|---|---|
| 0–1 | Header | 0x55 0x61 |
| 2–3 | Accel X | / 32768 * 16 |
| 4–5 | Accel Y | / 32768 * 16 |
| 6–7 | Accel Z | / 32768 * 16 |
| 8–9 | Gyro X | / 32768 * 2000 |
| 10–11 | Gyro Y | / 32768 * 2000 |
| 12–13 | Gyro Z | / 32768 * 2000 |
| 14–15 | Roll | / 32768 * 180 |
| 16–17 | Pitch | / 32768 * 180 |
| 18–19 | Yaw | / 32768 * 180 |
I verified all of this by laying the sensor flat and rotating it through known angles while watching the decoded values line up with what the WitMotion app reported — accel Z sat at ~1 g flat, roll and pitch hovered around 0°, and the angles tracked correctly as I tilted the sensor.
Building the custom component
Section titled “Building the custom component”I originally did all this decoding in lambda functions in ESPHome, but the YAML file was a bit messy, and I wanted to make it easier for others to use this sensor, so I decided to write a custom component. The original ESPHome project without the custom component can be seen here.
ESPHome external components are split in two — a Python file that defines the YAML schema and code-generation, and a C++ class that runs on the ESP32 at runtime.
The Python side — schema and codegen
Section titled “The Python side — schema and codegen”sensor.py registers witmotion_ble as a sensor platform and declares that each of the nine axes is optional, so users only include the ones they want. Each axis gets ESPHome’s standard sensor schema with the right unit (g, °/s, or °) and a STATE_CLASS_MEASUREMENT so Home Assistant treats them as time-series data and stores history correctly. The component also extends ble_client.BLE_CLIENT_SCHEMA, which is what makes ble_client_id: work in the YAML and ties this sensor to the right BLE connection.
The to_code function loops over the configured axes and calls the corresponding C++ setter (set_roll, set_pitch, etc.) on the component, wiring each YAML key to the matching pointer in the C++ class.
The C++ side — BLE events and decode
Section titled “The C++ side — BLE events and decode”The C++ class extends BLEClientNode, which gives it a gattc_event_handler callback for every GATT event from ESPHome’s BLE stack. The interesting events are:
ESP_GATTC_SEARCH_CMPL_EVT— fires once the ESP32 has discovered all services on the sensor. The handler looks up the0xffe4characteristic inside the0xffe5service by UUID, stashes its handle, and registers for notifications.ESP_GATTC_REG_FOR_NOTIFY_EVT— fires once the notify subscription is accepted. The handler flips the node state toESTABLISHED, which tells ESPHome’s BLE machinery the connection is live.ESP_GATTC_NOTIFY_EVT— fires for every 20-byte packet the sensor pushes. The handler checks the handle matches the one we registered, then hands the buffer off toparse_packet_.
parse_packet_ rejects anything that isn’t 20 bytes long or doesn’t start with the 0x55 0x61 header, which keeps stray notifications from publishing garbage to Home Assistant. The rest is the decode itself — a small lambda pulls a signed 16-bit little-endian integer out at any offset, and each axis applies its own scale before publishing:
auto i16 = [&](int offset) -> int16_t {  return (int16_t)(data[offset] | (data[offset + 1] << 8));};
if (accel_x_) accel_x_->publish_state(i16(2)  / 32768.0f * 16.0f);...if (roll_)    roll_->publish_state(i16(14) / 32768.0f * 180.0f);if (pitch_)   pitch_->publish_state(i16(16) / 32768.0f * 180.0f);if (yaw_)     yaw_->publish_state(i16(18) / 32768.0f * 180.0f);
The if (sensor_) guard before each publish_state means we don’t waste a publish on axes the user didn’t configure in YAML — the pointer is only set if that key was in the config.
The full source — Python schema, C++ header, and C++ implementation — is on GitHub: Witmotion ESPHome Component
Step By Step Setup Instructions
Section titled “Step By Step Setup Instructions”Step 1 — Mount the WitMotion sensor
Section titled “Step 1 — Mount the WitMotion sensor”Install the WT9011DCL on a flat surface in your van. Make sure it is also square with your van. It doesn’t really matter which side is facing which way, as long as it is flat and square. You can always invert the sensor values depending on how you mounted yours.
Plug the sensor in with USB and press the button to power it on. Ideally the sensor always remains powered, but it does have a built in battery that lasts between 8 and 40 hours (depending on your settings) in case your van loses power. I have not tested how the WitMotion sensor recovers after it loses power and the battery dies, but worst case scenario you would simply have to press the button to power it on again, and re-calibrate it.
Step 2 — Calibrate the sensor (optional)
Section titled “Step 2 — Calibrate the sensor (optional)”My sensor seemed well calibrated out of the box, but in case yours seems a bit off, here’s how you can calibrate it. This can also help reduce any error if you didn’t perfectly mount the sensor.
Start by parking your van on a completely level surface. Then download the WitMotion App (also available on iOS).
In the app, connect to your sensor, then go to Settings → Calibration and click “Angle reference”. This should zero all the angle readings.
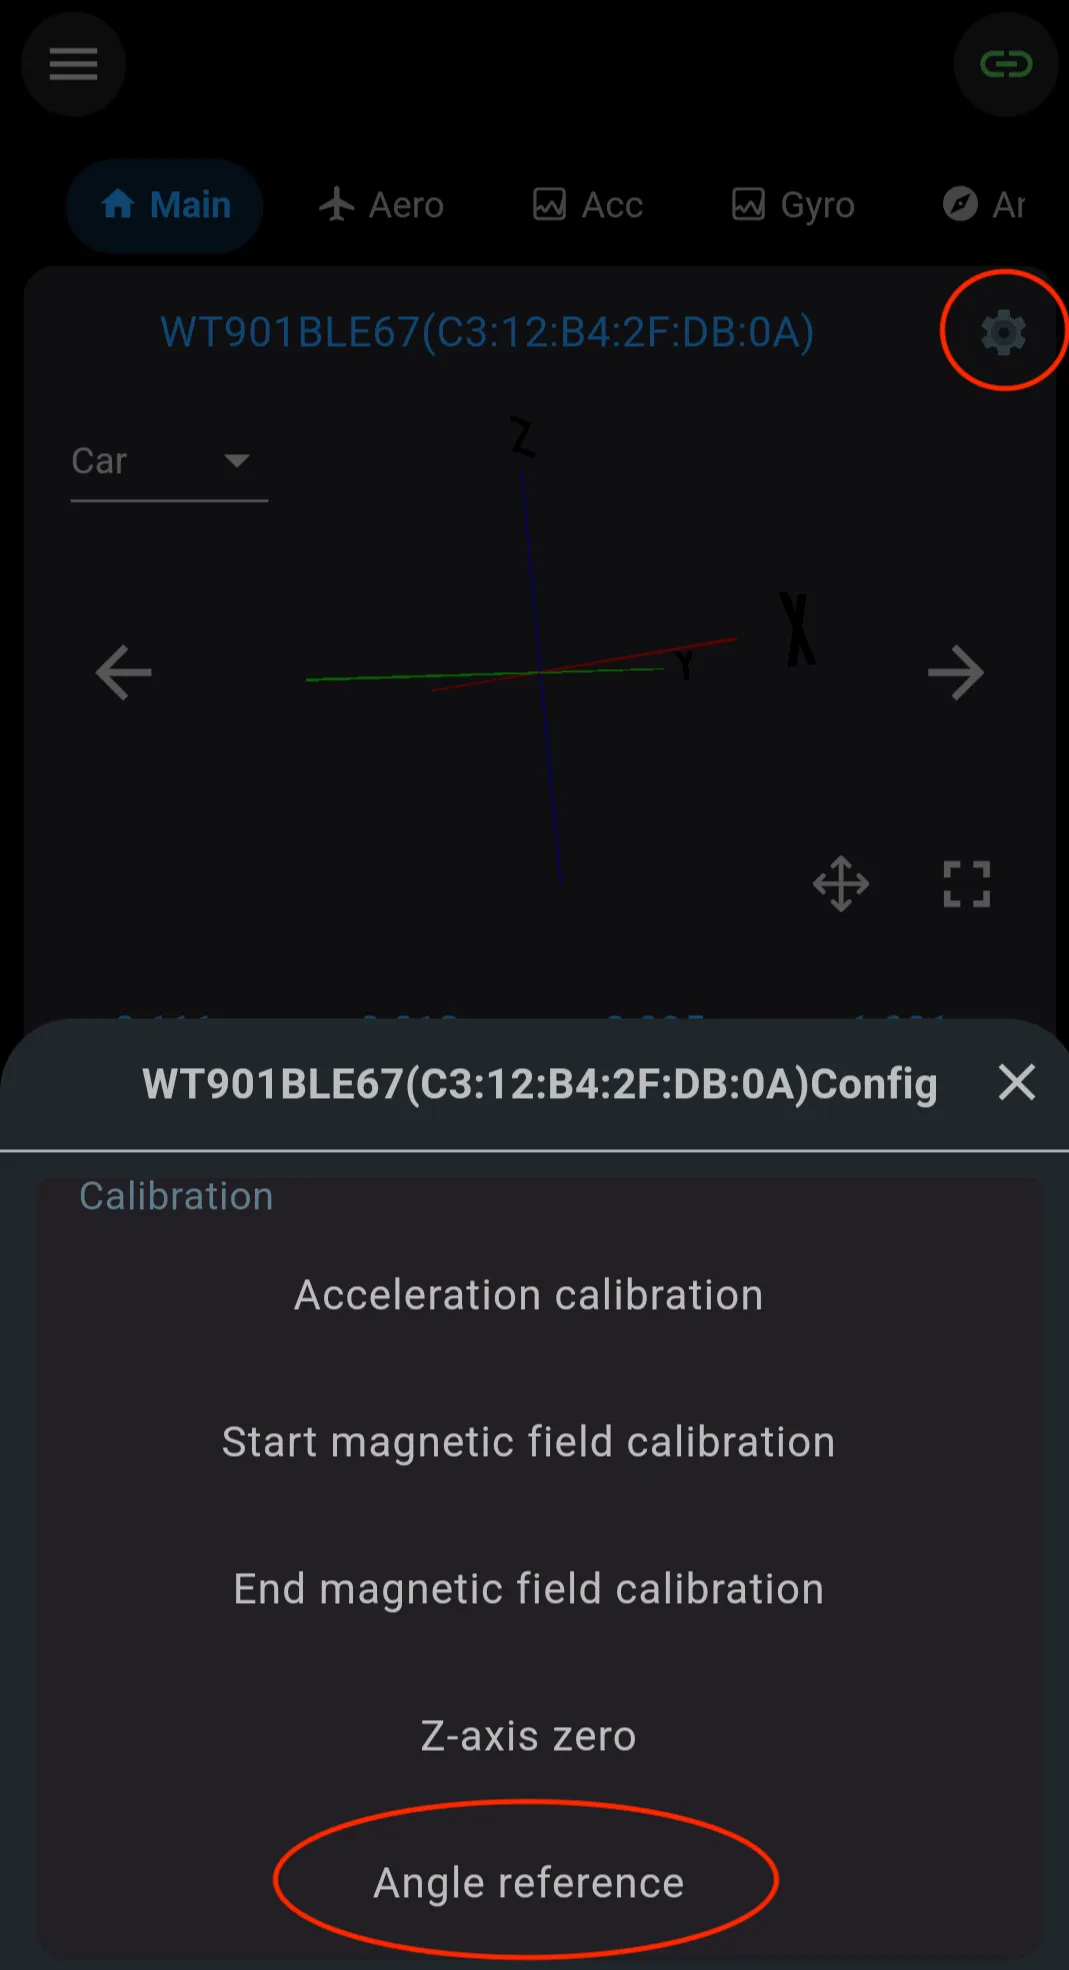
While you’re in the app, note the sensor’s MAC address (C3:12:B4:2F:DB:0A in the above image). You’ll need it for the ESPHome config in the next step.
Some other settings I also like to change are the Bandwidth and Return Rate. Since we are dealing with slow changes to the angles when parking the van, I like to reduce the Bandwidth to the lowest possible value (5Hz) and the return rate to 2Hz. Reducing the bandwidth smooths out the readings and reduces noise, and a return rate of 2Hz means it will send updates to Home Assistant twice per second. Plenty fast enough for a van tilt monitor.
Step 3 — Flash the ESP32 with ESPHome
Section titled “Step 3 — Flash the ESP32 with ESPHome”I won’t cover installing ESPHome here, but there are plenty of guides online for installing it if you don’t have it already.
Once installed, create a new device in the ESPHome dashboard (pick the ESP32 variant that matches your board). When prompted for the config, replace it with the following, swapping in your sensor’s MAC address and Wi-Fi credentials. You could have other differences in your config, but the important bits to include for the WitMotion sensor are the external_components, ble_client, and sensor.
external_components:  - source: github://CF209/witmotion_esphome_custom_component    components: [witmotion_ble]
esphome:  name: witmotion-bridge  friendly_name: WitMotion Bridge
esp32:  board: esp32-c6-devkitc-1  framework:    type: esp-idf
wifi:  ssid: !secret wifi_ssid  password: !secret wifi_password  ap:    password: !secret fallback_password
logger:api:ota:  - platform: esphome    password: !secret ota_password
ble_client:  - mac_address: "C3:12:B4:2F:DB:0A"    id: witmotion_sensor
sensor:  - platform: witmotion_ble    ble_client_id: witmotion_sensor    roll:      name: "Van Roll"    pitch:      name: "Van Pitch"
More details on the custom ESPHome component can be found here: Witmotion ESPHome Component
Connect the ESP32 to your computer via USB and install the ESPHome config to your device. The first flash has to be over USB — after that you can update wirelessly.
Step 4 — Add the device to Home Assistant
Section titled “Step 4 — Add the device to Home Assistant”Once the ESP32 boots and connects to Wi-Fi, Home Assistant will auto-discover it through the ESPHome integration. You’ll see a notification under Settings → Devices & Services.
Click Configure, accept the device, and the sensors (Van Roll, Van Pitch) will appear as entities.
Step 5 — Install the custom Lovelace card via HACS
Section titled “Step 5 — Install the custom Lovelace card via HACS”The custom van-shaped tilt card from the original write-up is now installable through HACS. If you don’t have HACS yet, follow their install guide first.
In Home Assistant:
- Go to HACS → Frontend
- Click the ⋮ menu in the top right and select Custom repositories
- Add:
- Repository:
https://github.com/CF209/van-tilt-sensor-custom-card - Category: Dashboard
- Repository:
- Click Add, then find the card in the HACS list and click Download
- Hard refresh your browser (Cmd+Shift+R / Ctrl+Shift+R)
Then add the card to your dashboard. Edit the dashboard, click Add Card → Manual, and paste:
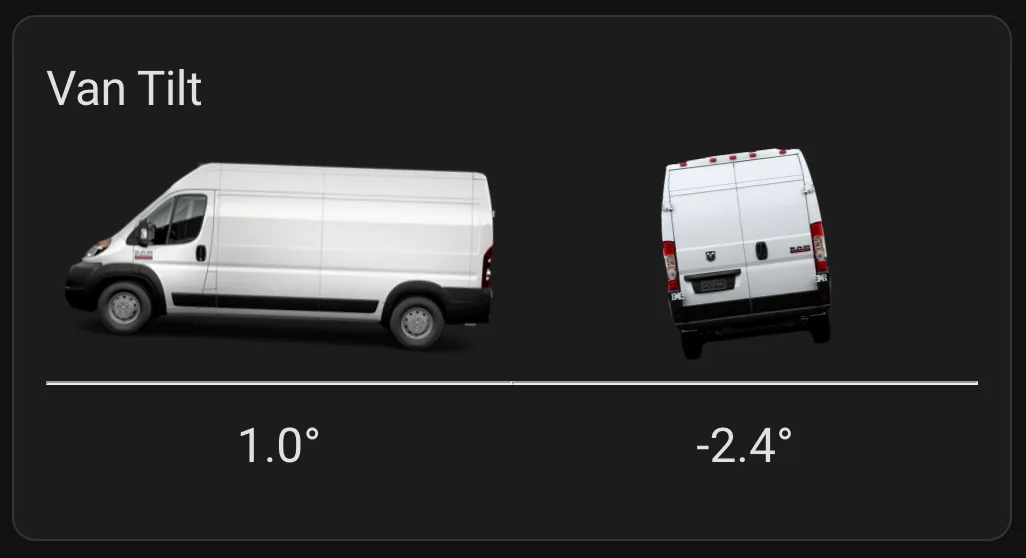
type: custom:van-tilt-cardentity_x: sensor.witmotion_bridge_van_rollentity_y: sensor.witmotion_bridge_van_pitchThe card draws a van that tilts in real time to match the sensor readings:
Powering the sensor with a battery
Section titled “Powering the sensor with a battery”I haven’t tested this, but I thought I’d throw in some theoretical calculations for anyone that wants to battery power their sensor.
To maximize battery life, I would recommend going into the settings and reducing the Bandwidth and Return Rates to their lowest possible values (5Hz and 0.2Hz respectively).
The documentation on the battery appears to be inconsistent with some sources reporting a 130mAh battery and 8h of battery life, and others reporting a 100mAh battery and 40h of battery life. The actual battery life most likely also varies depending on the device configuration. Neither of these battery lives are long enough to be useful in a van, so no matter what, you’ll need to add an external battery.
For my calculations, I’ll give the best case and worst case scenarios with an external 10,000mAh battery.
Best Case (assuming 40h battery life on 100mAh battery): (40/100) * 10100 = 4040 hours or ~168 days
Worst Case (assuming 8h battery life on 130mAh battery): (8/130) * 10130 = 623 hours or ~26 days
In the best case you’d still need to charge the battery about twice a year. In the worst case you’d need to charge it every month. The actual battery life would most likely be somewhere in between which in my opinion isn’t worth it when I can just power it from my van house batteries with USB and forget about it.
Wrap-up
Section titled “Wrap-up”In the end I was successful in connecting the WitMotion sensor to Home Assistant so you can now create a van tilt sensor fully with off the shelf components! I’m already thinking about where to take this next. Some ideas are:
- Other applications for an accelerometer in the van
- Finding an alternative to the WitMotion sensor that can be battery powered with a long enough life to be useful