Overview
Tutorials
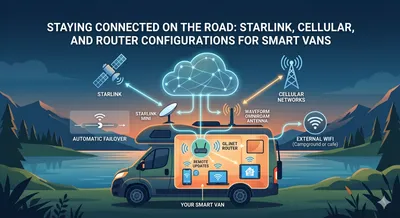
Internet Connectivity for Your Campervan
Compare internet options for your campervan; from a full Starlink + cellular hotspot setup to bare bones travel routers

Choosing a Home Assistant Device
Compare Home Assistant Green, Raspberry Pi 4, Raspberry Pi 5, and mini PCs for running Home Assistant in a campervan — covering power draw, connectivity, storage reliability, and 12V compatibility.
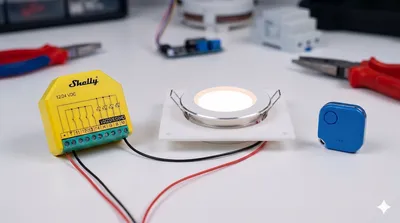
Standalone Smart Lights
Install Shelly Plus RGBW and Shelly BLU Buttons for hub-free smart van lighting with Bluetooth remote switches and optional Home Assistant integration.
Original Project
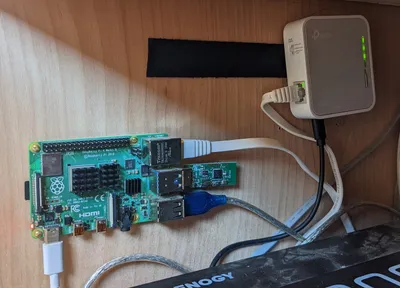
Setting up the Raspberry Pi
Get the Raspberry Pi powered, flashed with Raspberry Pi OS, and accessible remotely over SSH.
Installing Home Assistant
Install Home Assistant as a Docker container on the Raspberry Pi and access it from any device on your network.
Controlling the Lights
Use N-Channel MOSFETs and Raspberry Pi GPIO pins to control and dim 12V LED lights through Home Assistant.
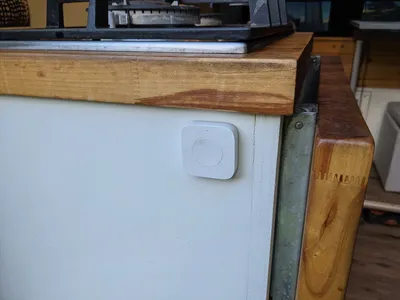
Adding Wireless Switches
Add Zigbee wireless buttons around the van to control the lights without running any new wiring.
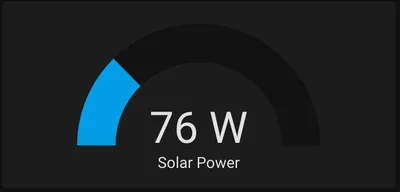
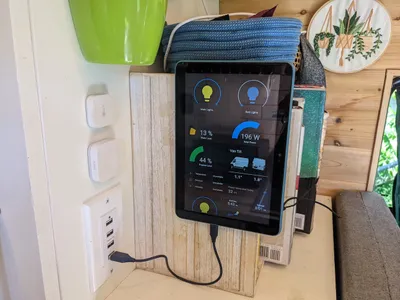
Monitoring Solar Power
Read data from a Renogy charge controller over serial and publish it to Home Assistant via MQTT.
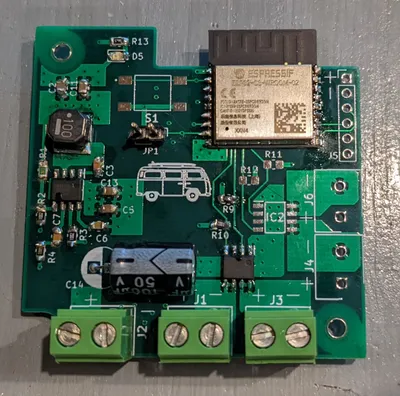
Monitoring Water Level
Install a resistive water level sensor in your freshwater tank and read it with a custom ESP8266 PCB through ESPHome.
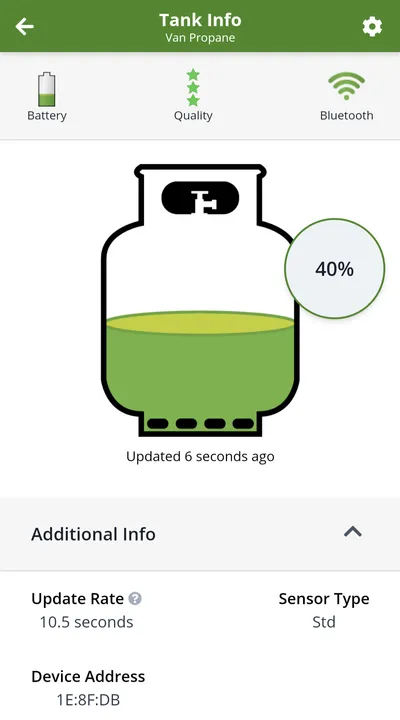
Monitoring Propane Level
Reverse-engineer the Mopeka Tank Check Bluetooth sensor to integrate propane level readings into Home Assistant.
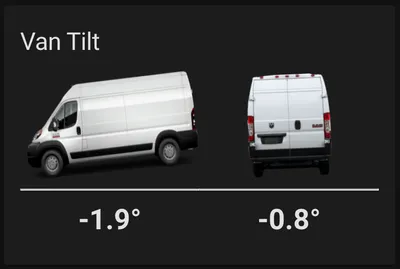
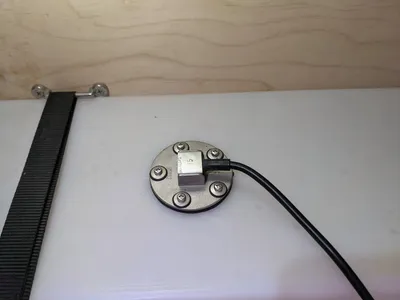
Adding a Van Tilt Sensor
Use an MPU6050 accelerometer with ESPHome to show the van's tilt angle in degrees on a custom Home Assistant card.
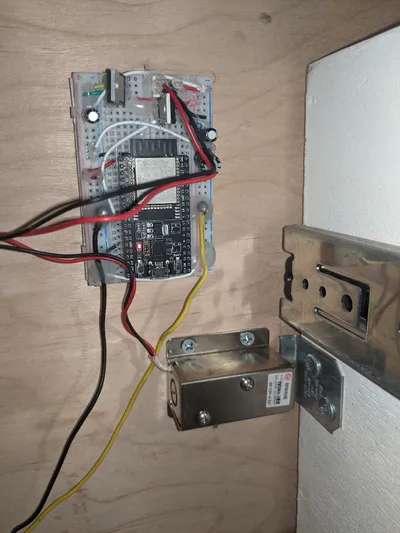
Auto-Locking Drawers
Use a solenoid door latch and the van's ignition signal to automatically lock drawers when driving.