Adding a Van Tilt Sensor
The next sensor I thought would be useful was a level sensor to see how flat the van is. When parking for the night, it’s always more comfortable if the van is level — I’d always find myself inching forward and backward asking “is it better now?”. The easy solution would be a bubble level, but I thought it would be much more interesting to incorporate it into Home Assistant.
What you’ll need
Section titled “What you’ll need”- MPU6050 Accelerometer — Measures gravity on 3 axes to determine which way is down. Also has a gyroscope (not needed for this project).
- ESP32 or ESP8266 — To send the data to the Raspberry Pi over WiFi, or you can interface the MPU6050 directly with the Pi.
The hardware
Section titled “The hardware”Any 2 or 3-axis accelerometer works for this, but the MPU6050 is widely available with lots of breakout boards:
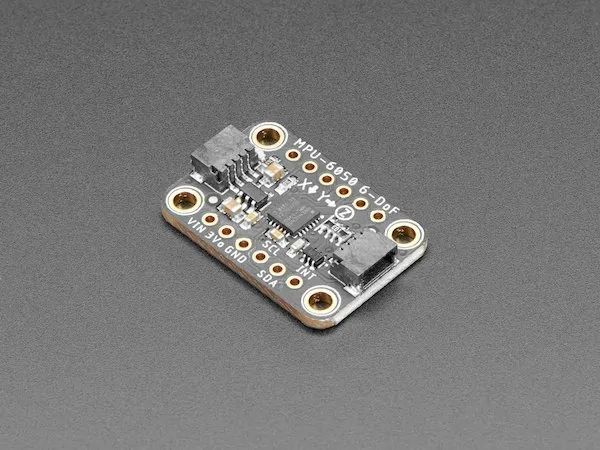
The MPU6050 communicates via I2C. I wanted to mount it under my bed platform, which was too far from the Pi, so I used an ESP8266 to communicate with the MPU6050 and send data over WiFi.
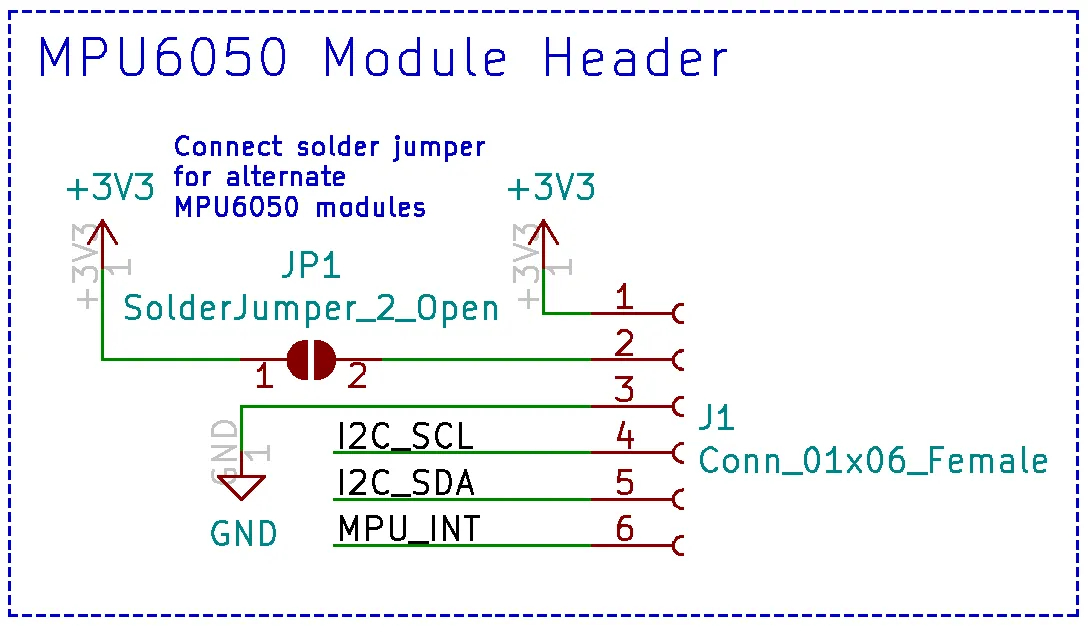
If you built the water level sensor PCB, there’s a 6-pin I2C header on that board (J1) added specifically for the MPU6050. In its default state it works with the Adafruit MPU6050 module. Closing the JP1 solder jumper also accommodates cheaper MPU6050 modules from Amazon.
KiCad files: ESP8266 PCB KiCad Files
Step 1 — Configure ESPHome
Section titled “Step 1 — Configure ESPHome”ESPHome has built-in support for the MPU6050:
Open the ESPHome dashboard and create a new device (Generic ESP8266). Add the following to the config:
i2c:  sda: 2  scl: 14
sensor:  - platform: mpu6050    address: 0x68    update_interval: 200ms    accel_x:      name: "MPU6050 Accel X"    accel_y:      name: "MPU6050 Accel Y"
Adjust the I2C pin numbers if your setup is different. The default I2C address for the MPU6050 is 0x68. I set an update interval of 200ms and only read the X and Y acceleration axes — these are enough to calculate left-to-right and front-to-back tilt.
Step 2 — Convert to degrees in Home Assistant
Section titled “Step 2 — Convert to degrees in Home Assistant”With the ESPHome integration, the new sensor is automatically detected. To convert raw acceleration values to degrees, use this equation:
tilt (degrees) = arcsin(acceleration / gravity) × 180 / πAdd template sensors to configuration.yaml:
- platform: template sensors: x_angle: friendly_name: "X Angle" unit_of_measurement: "°" value_template: '{{ ((asin((states("sensor.mpu6050_accel_x") | float) / 9.81) * 180 / pi) - 2.8) * -1 }}' y_angle: friendly_name: "Y Angle" unit_of_measurement: "°" value_template: '{{ ((asin((states("sensor.mpu6050_accel_y") | float) / 9.81) * 180 / pi) + 0.3) * -1 }}'The offset values (2.8 and 0.3) came from calibrating with a phone level app at multiple inclines. The -1 multiplier inverts the readings to match my preferred orientation.
Step 3 — Add a low-pass filter
Section titled “Step 3 — Add a low-pass filter”There was quite a bit of sensor noise, so I added a low-pass filter:
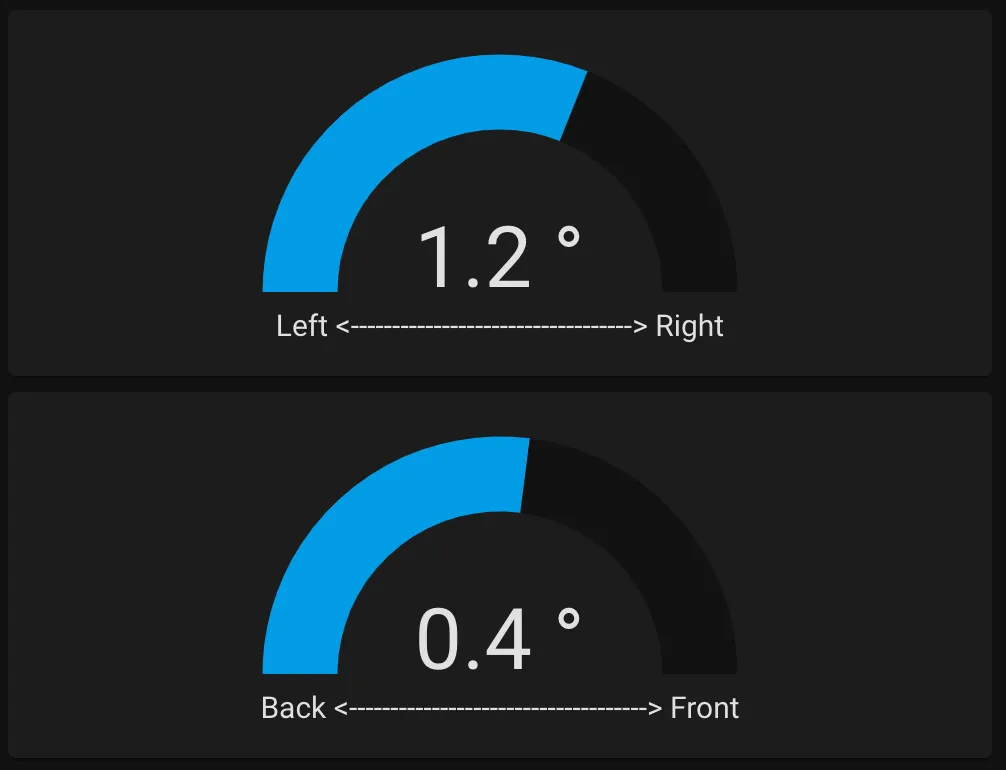
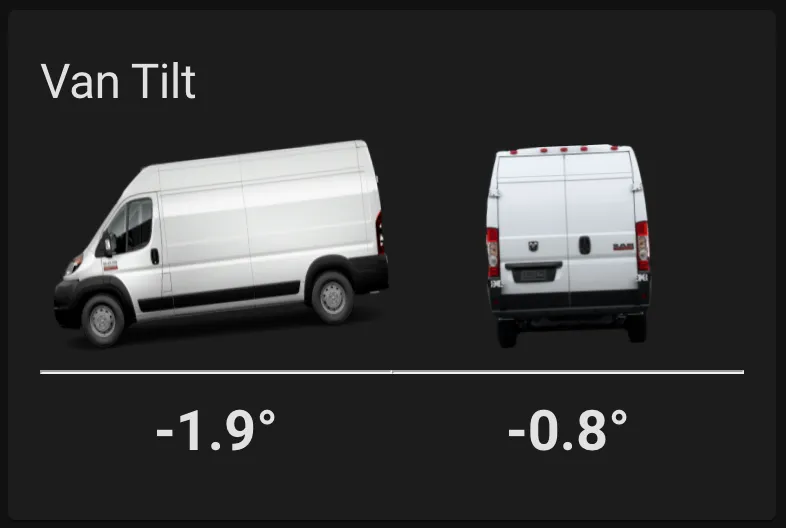
- platform: filter name: "Filtered X Angle" entity_id: sensor.x_angle filters: - filter: lowpass time_constant: 5 precision: 1 - platform: filter name: "Filtered Y Angle" entity_id: sensor.y_angle filters: - filter: lowpass time_constant: 5 precision: 1The end result is a sensor showing the van’s tilt, making it much easier to find a level parking spot:
Update: Custom Lovelace card
Section titled “Update: Custom Lovelace card”I wasn’t happy with how the default sensors looked, so I made a custom Lovelace card that shows the tilt visually with a van graphic that tilts in real time:
The code for the card: Van Tilt Sensor Custom Card
To install:
- Create a new folder at
homeassistant/www/van-tilt-card/and download the files there. - In Home Assistant go to Configuration → Lovelace Dashboards → Resources and click Add Resource.
- Enter
/local/van-tilt-card/van-tilt-card.jsfor the URL and JavaScript Module for the type. - Add the card to your dashboard manually with:
type: 'custom:van-tilt-card'entity_x: sensor.filtered_x_angleentity_y: sensor.filtered_y_angle